
Web Component - Current Accounts List
Seamlessly display and manage merchant account lists with the Current Accounts List Web Component
👋 Introduction
This documentation will walk you through integrating the current-accounts-list web component into your application. This component is designed to present a consolidated view of all current accounts associated with a merchant, facilitating quick access and management within your platform.
The guide includes a handy TL;DR section for those who want to dive right into the code feeling bold. However, we highly encourage you to read the entire guide, as it introduces crucial concepts.
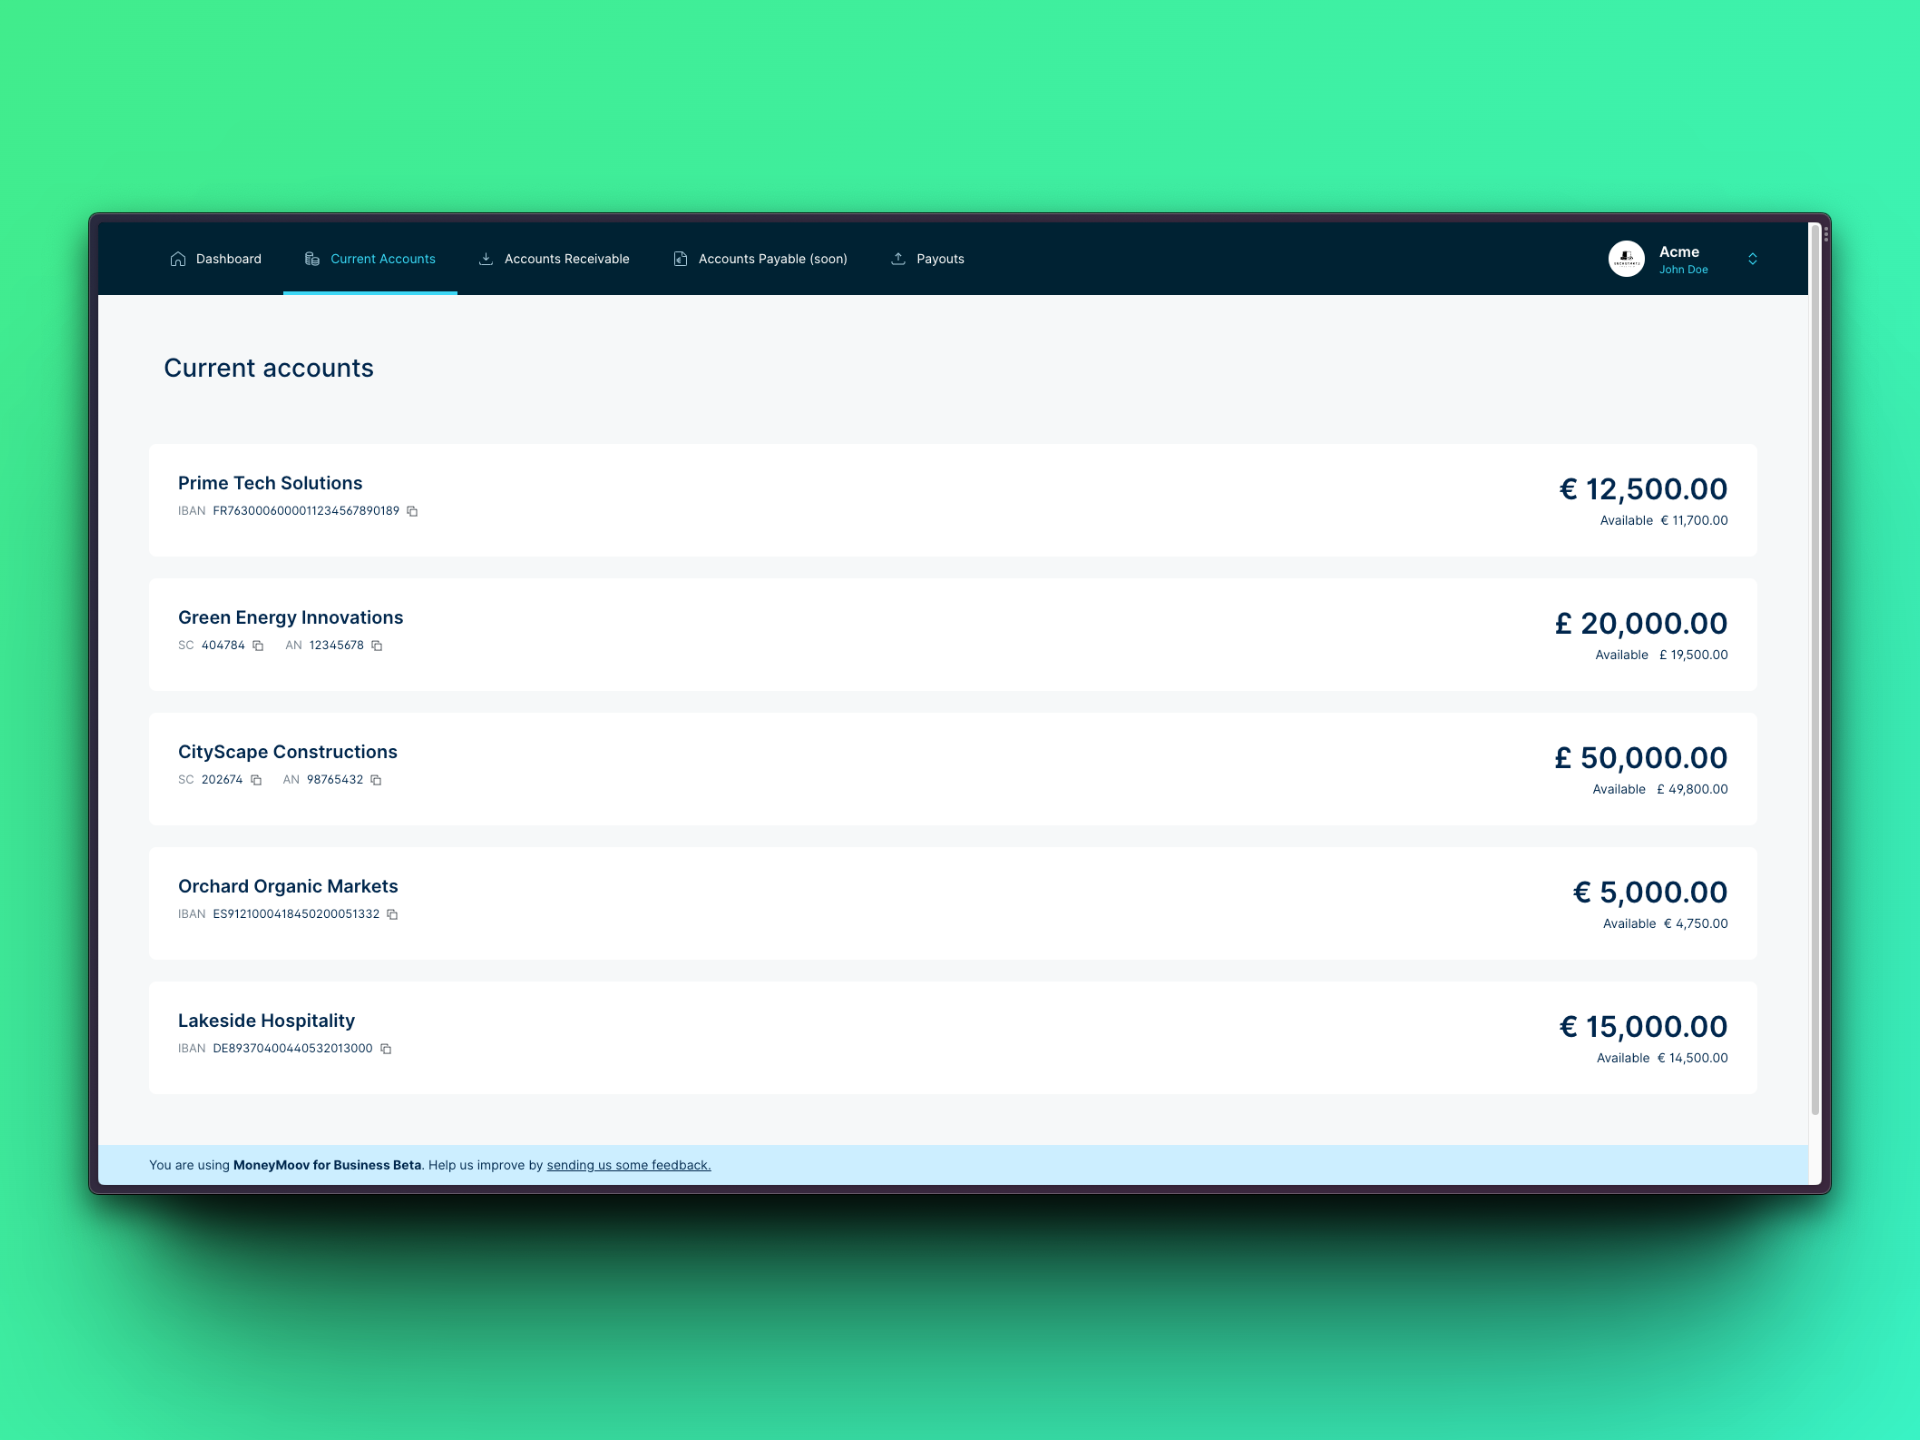
This is how the component looks on our own site, MoneyMoov For Business!
🏃♂️💨 TL;DR
- Prepare your user-specific
tokenandmerchantId.- Integrate the current-accounts-list component using these credentials.
- Implement the
onAccountClickfunction for account selection interactions.- You're all done 😎
<!DOCTYPE html>
<html>
  <head>
    <meta charset="UTF-8" />

    <!-- 👇🏻 Add NoFrixion Web Components library  -->
    <script src="https://cdn.nofrixion.com/nofrixion-webcomponents.js"></script>

  </head>
  <body>

    <!-- 👇🏻 Embed NoFrixion Current Accounts List Web Component  -->
    <current-accounts-list
      token="{YOUR_TOKEN}"
      apiurl="https://api.nofrixion.com/api/v1"
      merchantid="{YOUR_MERCHANT_ID}"
      on-account-click="onAccountClicked">
    </current-accounts-list>

    <script type="text/javascript">
      function onAccountClicked(account) {
        console.log("Account selected: ", account);
        // Navigate to the account details or perform other actions here
      }
    </script>

  </body>
</html><!DOCTYPE html>
<html>
<head>
<meta charset="UTF-8" />
<!-- 👇🏻 Add NoFrixion Web Components library -->
<script src="https://cdn.nofrixion.com/nofrixion-webcomponents.js"></script>
</head>
<body>
<!-- 👇🏻 Embed NoFrixion Current Accounts List Web Component -->
<current-accounts-list
token="{YOUR_TOKEN}"
apiurl="https://api-sandbox.nofrixion.com/api/v1"
merchantid="{YOUR_MERCHANT_ID}"
on-account-click="onAccountClicked">
</current-accounts-list>
<script type="text/javascript">
function onAccountClicked(account) {
console.log("Account selected: ", account);
// Navigate to the account details or perform other actions here
}
</script>
</body>
</html>
Note that the URLs provided in this guide point to the Production environment, so make sure you're using the correct one (sandbox/production) accordingly.
| Sandbox | Production | |
|---|---|---|
| API | https://api-sandbox.nofrixion.com | https://api.nofrixion.com |
💻 Implementation Guide
ℹ️ Key concepts
🔐 Token
The token is a crucial piece of the security puzzle, acting as the passport for your requests within our system. It’s a unique identifier, generated when a user authenticates with the NoFrixion Identity Server. This user token ensures that only authorized actions are performed on behalf of the user. Handle this token with the utmost care, as it grants access to the user's associated merchant accounts and data.
🆔 Merchant ID
This identifier is the unique alphanumerical string that represents a specific merchant within the MoneyMoov system. When you want to fetch and display a list of current accounts, you will use this ID to specify from which merchant the accounts should be retrieved.
📃 Preconditions
For the current-accounts-list component to serve its purpose effectively, there is a prerequisites that need to be addressed:
-
User Authorization: For developer testing, a short-lived user token can be conveniently obtained by logging into the NoFrixion developer portal at https://portal.nofrixion.com/Account/CreateApiToken. This token will enable you to test the integration in a controlled environment with mock data.
When transitioning your application to production with live customer data, it is essential to implement a secure OAuth2 flow. This integration with NoFrixion's Identity Server will ensure that your customers' authentication process meets the highest security standards.
🛠️ Step-by-step
-
Include NoFrixion Web Components Library: The first step is to add the NoFrixion Web Components library to your project. Insert the following
<script>tag into the<head>section of your HTML:<head> <meta charset="UTF-8" /> <!-- 👇 Add NoFrixion Web Components library --> <script src="https://cdn.nofrixion.com/nofrixion-webcomponents.js"></script> </head> -
Embed the Current Accounts List Component: With the library included, you can now embed the
current-accounts-listcomponent in the body of your HTML where you want the list of accounts to appear:token: The user token obtained after authenticating with NoFrixion Identity Server.apiurl: The endpoint URL for the MoneyMoov API.merchantid: The Merchant ID for which you want to list accounts.on-account-click: Callback function when an account is clicked.
Replace{YOUR_TOKEN}and{YOUR_MERCHANT_ID}with the actual values. These should be dynamically set with data retrieved securely from your backend server as described in the preconditions section.
<body>

  <current-accounts-list
      token="{YOUR_TOKEN}"
      apiurl="https://api.nofrixion.com/api/v1"
      merchantid="{YOUR_MERCHANT_ID}"
      on-account-click="onAccountClicked">
  </current-accounts-list>

<body><body>
<current-accounts-list
token="{YOUR_TOKEN}"
apiurl="https://api-sandbox.nofrixion.com/api/v1"
merchantid="{YOUR_MERCHANT_ID}"
on-account-click="onAccountClicked">
</current-accounts-list>
<body>-
Implement the Callback Function: The
on-account-clickattribute requires a callback function that will run whenever an account is selected:<body> <script type="text/javascript"> function onAccountClicked(account) { console.log("Account selected:", account); // Additional logic to handle the account selection goes here } </script> <body>
Putting all the pieces together, the entire code should look like:
<!DOCTYPE html>
<html>
  <head>
    <meta charset="UTF-8" />

    <!-- 👇🏻 Add NoFrixion Web Components library  -->
    <script src="https://cdn.nofrixion.com/nofrixion-webcomponents.js"></script>

  </head>
  <body>

    <!-- 👇🏻 Embed NoFrixion Current Accounts List Web Component  -->
    <current-accounts-list
      token="{YOUR_TOKEN}"
      apiurl="https://api.nofrixion.com/api/v1"
      merchantid="{YOUR_MERCHANT_ID}"
      on-account-click="onAccountClicked">
    </current-accounts-list>

    <script type="text/javascript">
      function onAccountClicked(account) {
        console.log("Account selected: ", account);
        // Navigate to the account details or perform other actions here
      }
    </script>

  </body>
</html><!DOCTYPE html>
<html>
<head>
<meta charset="UTF-8" />
<!-- 👇🏻 Add NoFrixion Web Components library -->
<script src="https://cdn.nofrixion.com/nofrixion-webcomponents.js"></script>
</head>
<body>
<!-- 👇🏻 Embed NoFrixion Current Accounts List Web Component -->
<current-accounts-list
token="{YOUR_TOKEN}"
apiurl="https://api-sandbox.nofrixion.com/api/v1"
merchantid="{YOUR_MERCHANT_ID}"
on-account-click="onAccountClicked">
</current-accounts-list>
<script type="text/javascript">
function onAccountClicked(account) {
console.log("Account selected: ", account);
// Navigate to the account details or perform other actions here
}
</script>
</body>
</html>🧐 I still have questions
We hope that this guide has been helpful to you in implementing the NoFrixion Pay Element Web Component.
If you have any further questions or issues, please do not hesitate to reach out to our support team for assistance.
Updated over 1 year ago